You may want to include some very specific lists in the front matter of your blog to book project. All of these are optional.
If your book includes a number of unfamiliar abbreviations, a list would help your reader make sense of the text. The list should be alphabetized by the abbreviation, not the full meaning. Thus U.S.A. instead of the United States of America would determine where the abbreviation falls in the list.
A list of contributors is where you can include the names and a brief bio about the people who contributed to your blog to book project. This is not the same as the acknowledgments page although you are acknowledging the contributions of these people. A list of contributors includes relevant biographical information, like membership in certain organizations, current position demonstrating expertise in an area, academic affiliations or published works. Contributors are listed in alphabetical order by last name but written in standard order. So Henry S. Pingleton is not written Pingleton, Henry S. in the contributor list and comes before Johnny Quimby and after Yori Oliver.
If your text has a multitude of visuals including figures, diagrams, drawings, photos, charts, tables, or maps, you might want to include a list of figures, list of tables or list of illustrations. Capitalize the figure titles in the list. Use a highly descriptive title. Table 3 is not as informative as Table of Live Birth Rates in Mexico from 1887 – 1997.
Throughout your text, the figures should be numbered in Arabic numbers consecutively as they appear. Otherwise, you can use a chapter – number system to keep track. For instance Figure 8-2 would be the second visual in chapter 8.
In your ebook, you will hyperlink the figure title to the figure in the text. In a print book, listing the page number is sufficient.
Although most often found in fiction books, you may also want to include a list of characters in your blog to book project if it would be hard for the reader to keep track of the people and relationships in your story without a guide. You can organize the list by order of appearance or family groups or overlapping relationships, whichever would be most useful for the reader.
A reference list is found at the end of each chapter in an ebook. Here you would include all works that are cited in the chapter. This list may also be called endnotes. List the entries alphabetically unless you are using a numbered citation system in the chapter.
Assignment:
Decide if your blog to book project needs any lists. If so, make it so.
I have used Kindle Direct Publishing (KDP) for all my books. There are other self-publishing sites out there which may be just as good, however, I am not as familiar with the process and you would do better to get information from an author who has used those publishing sites.
With KDP you can publish an ebook or print book to Amazon in under an hour, depending on the number formatting errors you have. And, if you edit or add sections to your book, all you have to do is upload the manuscript again.
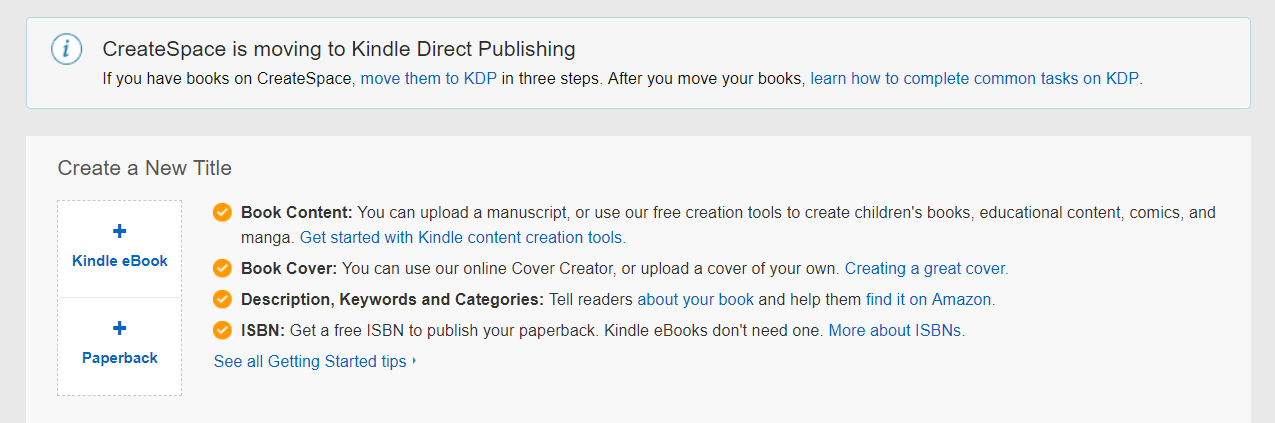
So here’s how it works. You can sign in with your Amazon account here. You do have an Amazon account, don’t you? That will take you to your bookshelf. You’ll see a section that says Create a New Title. I always create my ebook version first because I find there fewer formatting errors for me to fix.
Ebook Book Details
Language
Choose the language your book is written in.
Book Title
Type in the book title and subtitle if you have one.
Series
If your book is part of a series, you’ll enter that information in this section
Edition Number
If you are creating a new edition of a book, you would include that information next.
Author
Add your name as the Author as you wish it to appear.
Contributors
Then list any contributors you would like to appear in your title and on the cover. This is a little different than your contributors’ page in the book itself.
Description
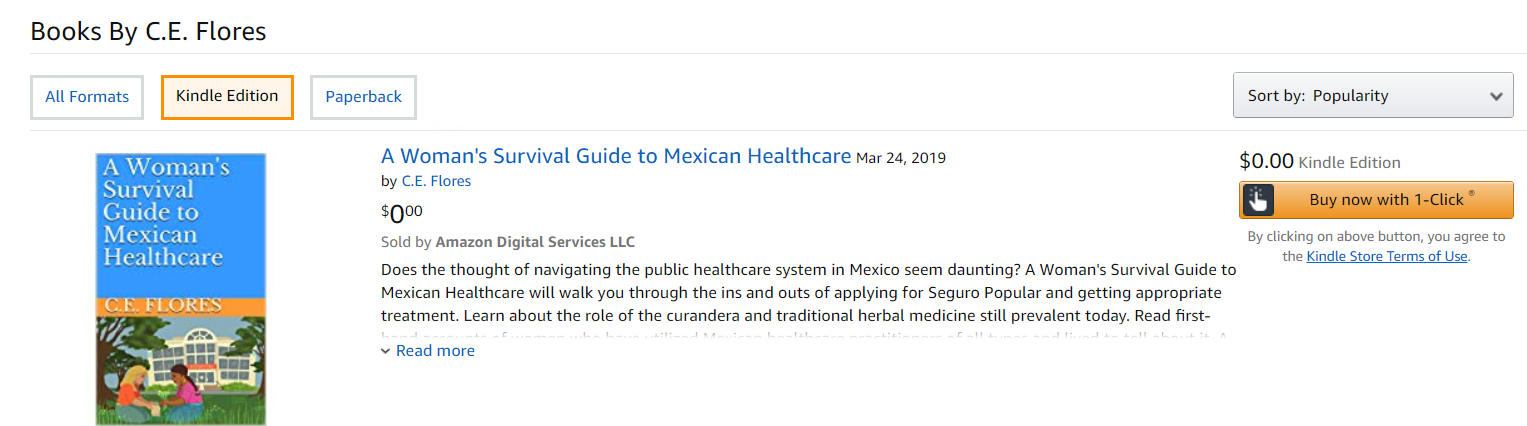
Your book description should be a short blurb intended to get people interested in your book. When this is displayed on the book page on Amazon, only the first few lines will be visible without having to click on Read more, so you’ll want to concentrate on making the introduction reader worthy.
Publishing Rights
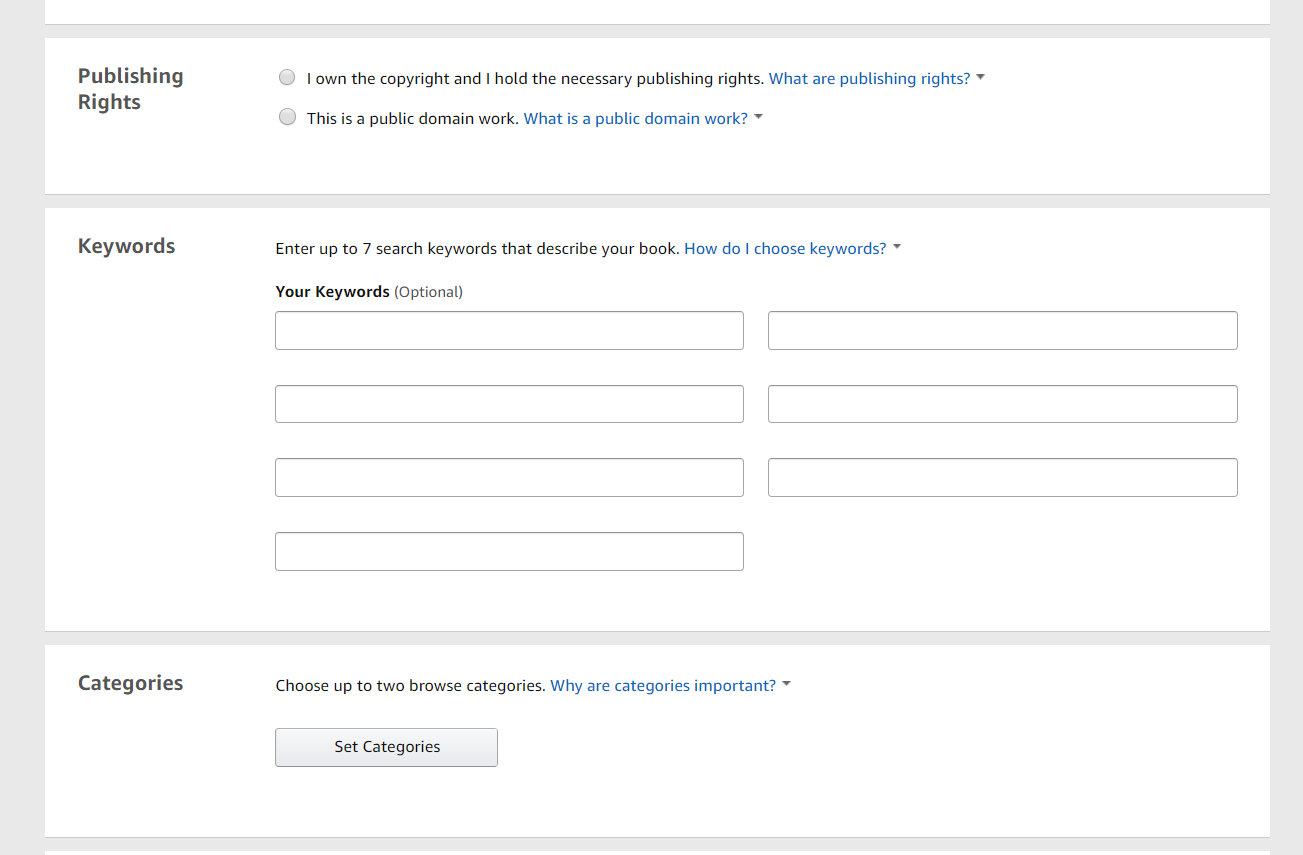
The next category is Publishing Rights. As this is a Blog to Book Project, you will choose “ I own the copyright and I hold the necessary publishing rights.” Unless you take your blog posts down before uploading your manuscript, you may get a notification from Amazon saying that the content of your book is already freely available on the web. That’s perfectly fine. You just have to resubmit the manuscript verifying that you are the author of those freely available posts.
Keywords
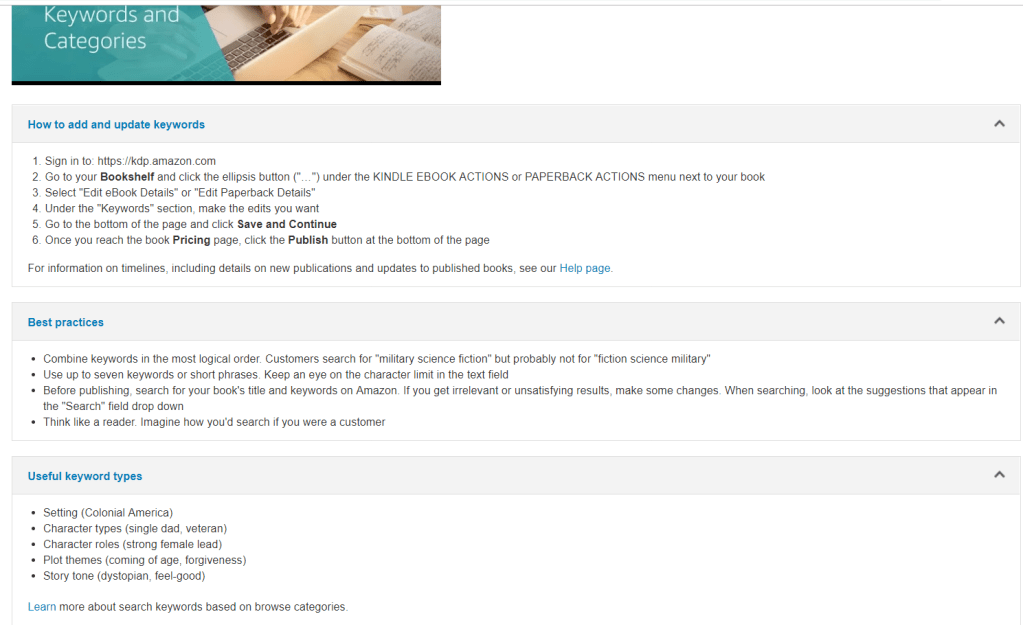
You should spend some time listing the most relevant keywords next. Amazon gives some great tips for choosing the best keywords here. In general, you want to pick keywords that a reader might use to find your book’s topic. So if you write about zebras bred in captivity you might include zebra, zebras in zoos, zebra babies, animals bred in captivity, zoo babies and so on. Doing searches on Amazon for books similar to your own will also help you decide which keywords will get you the most readers.
Categories
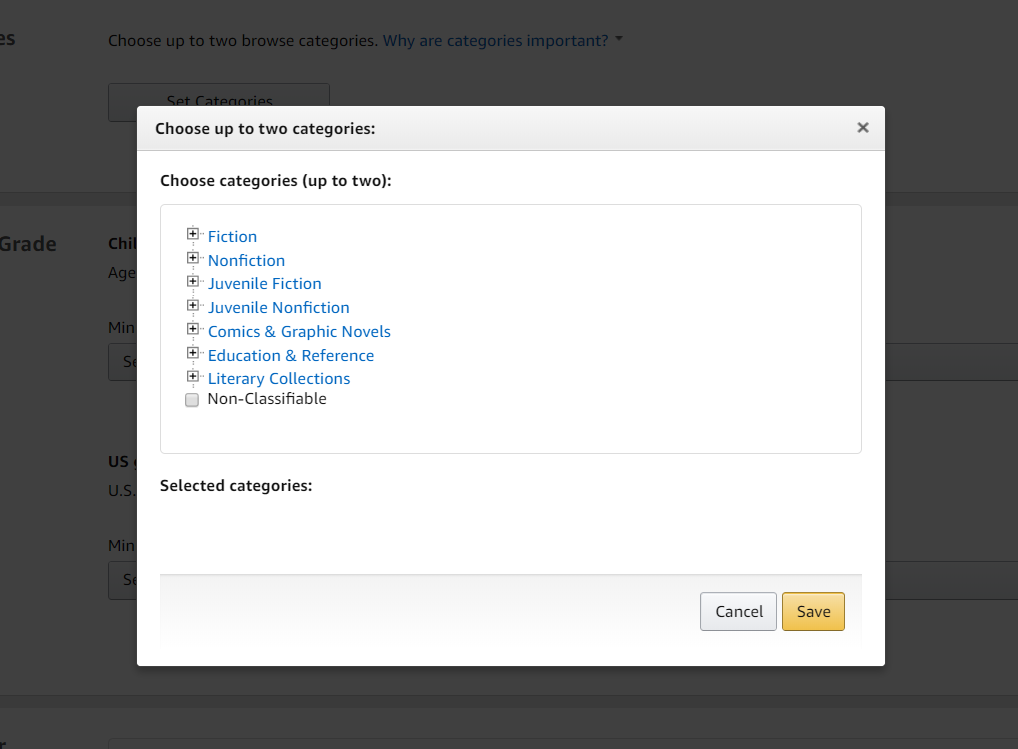
You can choose two categories to help classify your book. Spend some time looking through the lists. Do another search and see what categories those books that are like yours are using. Try to be as specific as possible. Nonfiction > Self-Help > Death, Grief, Bereavement is more specific than just Nonfiction and a better category for your book about how you coped with the loss of your beloved pet.
Age and Grade Range
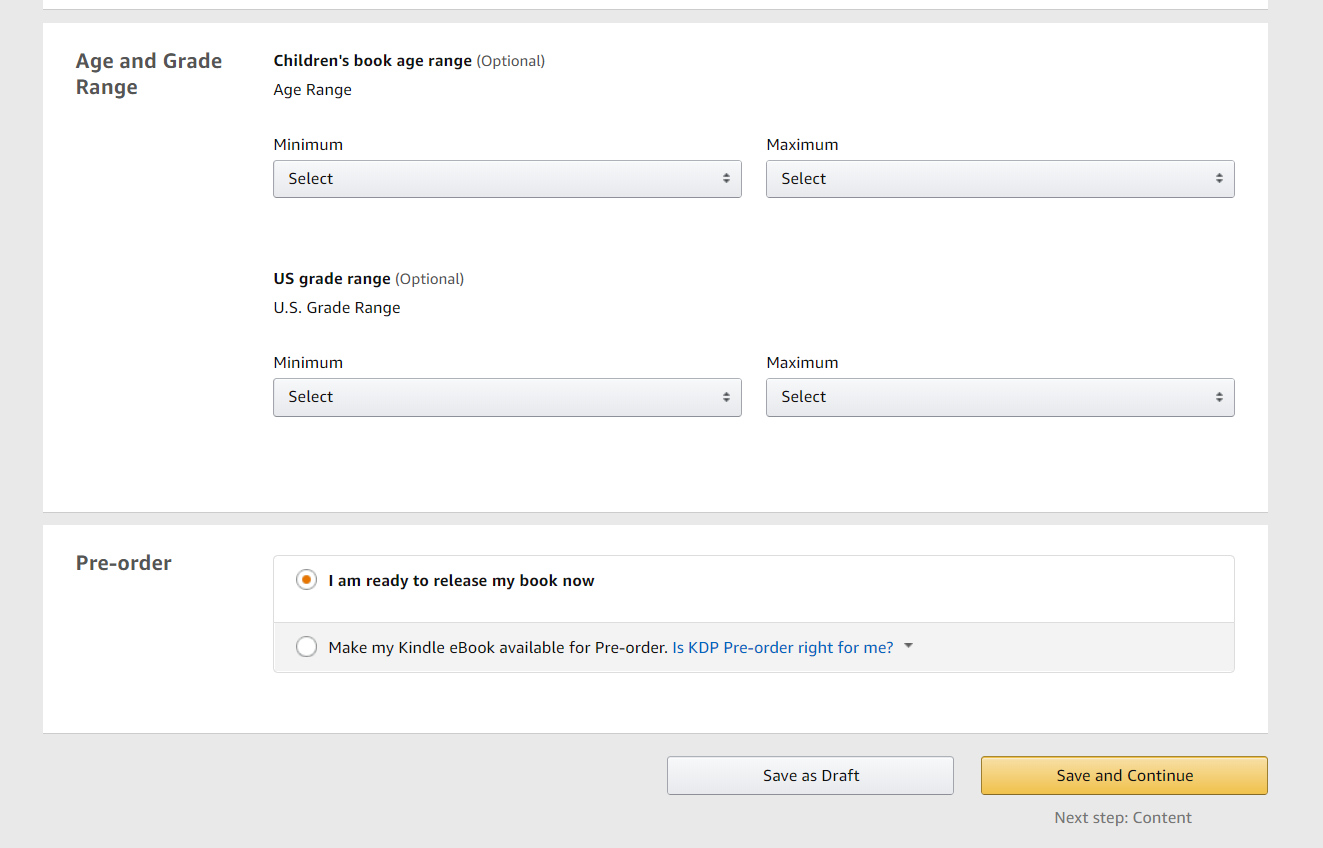
If you like, you can choose an age or grade range. Doing so is completely optional, but if you think it would help readers find your book, certainly do so. If you aren’t sure about the grade range, remember Hemminway will give you an approximate level for free.
Pre-Order
The last section on this page is to choose whether your book is ready for publishing or if you would like to generate some pre-order publicity hype first. It’s entirely up to you. Then choose Save and Continue to move along to the next step.
Once the new page opens up, you’ll see a check mark next to the work Complete if you have correctly added all the required fields.
Ebook Content
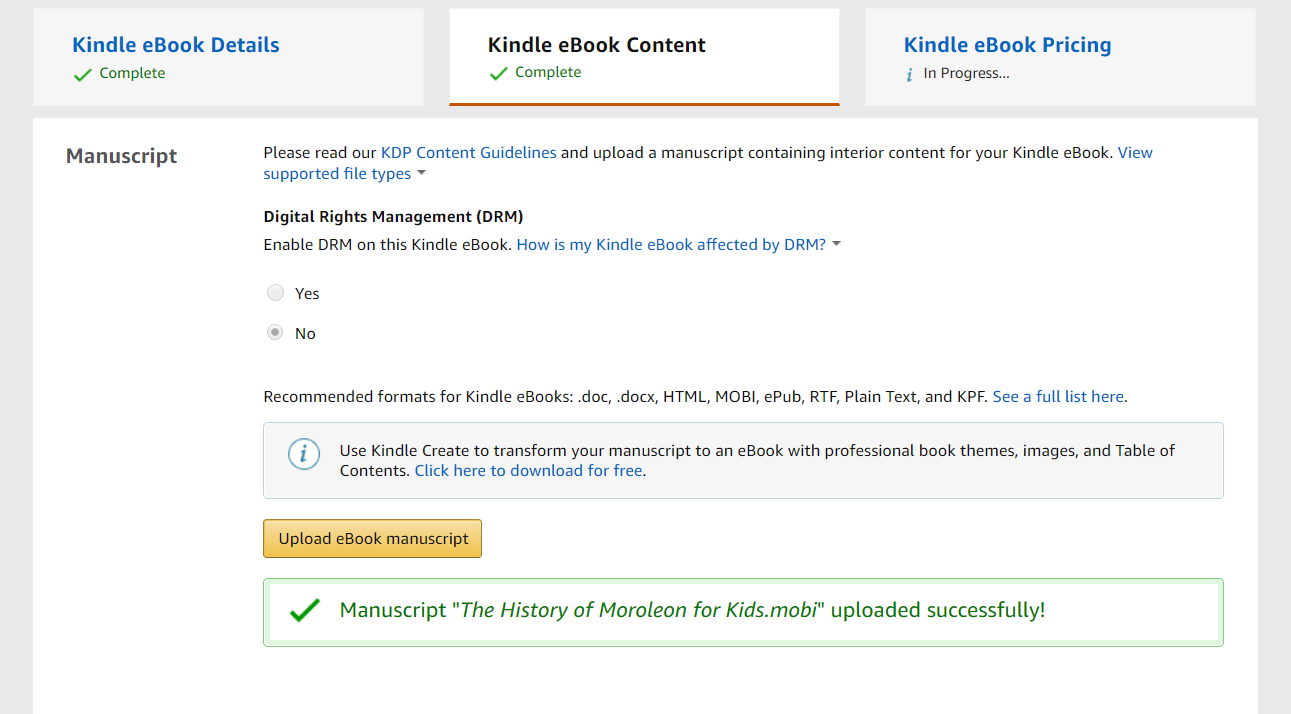
Digital Rights Management (DRM)
Digital Rights Management restricts readers from giving their copy of your ebook to someone else. Enabling it doesn’t prohibit someone from lending your ebook to another person for a short period of time or giving a copy of your ebook to someone else as a gift after purchasing.
Upload Ebook Manuscript
If you are sure you’ve done all the formatting correctly and have your ebook saved in one of these formats (.doc, .docx, HTML, MOBI, ePub, RTF, Plain Text, and KPF.) you can upload your ebook now. You can also download Kindle Create to format your book correctly. Doing so might save you some time and frustration in the long run because you just can’t publish until the formatting it right.
Amazon will also do a spell check for you. Since I use a number of Mexican Spanish words in some of my books, sometimes these words get highlighted as misspelled when they aren’t. It doesn’t hurt to double check the words Amazon finds because I guarantee you that no matter how many times you have proofread your manuscript, there are always a few that escape notice.
Kindle eBook Cover
If you have a cover design already, you can upload it at this point. I always use Cover Creator because tech savvy I am not. As we talked about in Judge Your Cover, the options are limited but you are assured that everything is the proper formatting size.
Kindle eBook Preview
Even if you think everything is good to go, you can not continue until you preview your cover and manuscript. There may be image issues, or you may find that one page has a huge amount of white space or some other issue. Amazon highlights certain issues for you to check, does some fiddling with a few things to help you out, but you should go page by page and check how your book looks on a tablet, phone or e-reader.
Kindle eBook ISBN
Kindle eBooks are not required to have an ISBN but if you have one, you can enter it here.
Save and Continue.
Kindle eBook Pricing
KDP Select Enrollment
You can enroll at KDP Select in the first section if you like. Benefits include being able to promote your book with free book promotions or countdown promotions. Drawbacks include not being able to publish your book at any other sites while it is enrolled.
Territories
Since you are publishing your blog posts in book form and you hold the copyrights to them, you can choose All Territories (worldwide rights).
Royalty and Pricing
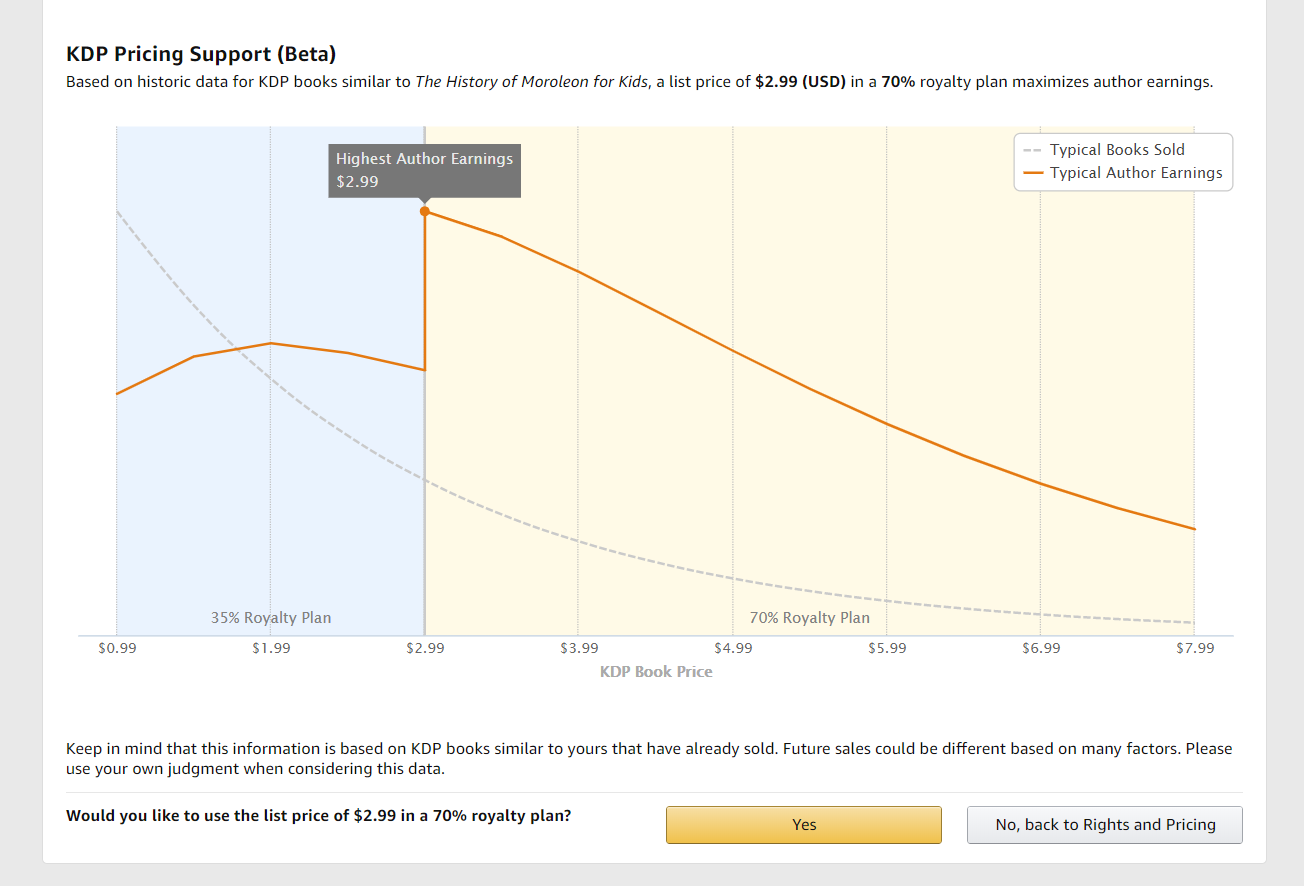
KDP Pricing Support (Beta) will give you an idea of what to charge for your ebook based on the prices of books similar to yours. You can use the figure Amazon provides (they generally know what they are talking about) or you can choose another price.
You can choose either 35% or 70% royalty commission percentage. Based on which you choose, Amazon will give you a minimum-maximum price range for you to select from. You can change the prices in other marketplaces either higher or lower if you like.
Matchbook
If you’d like to offer your ebook for free or at a reduced price to people who buy your print book, you can enroll it in Kindle Matchbook. It’s optional.
Book Lending
If you would like to allow your readers to lend a book to someone else after purchasing it for 14 days, you can enroll in book lending.
Terms & Conditions
If everything looks good after reading the terms and conditions, you can go ahead and click Publish Your Kindle Ebook.
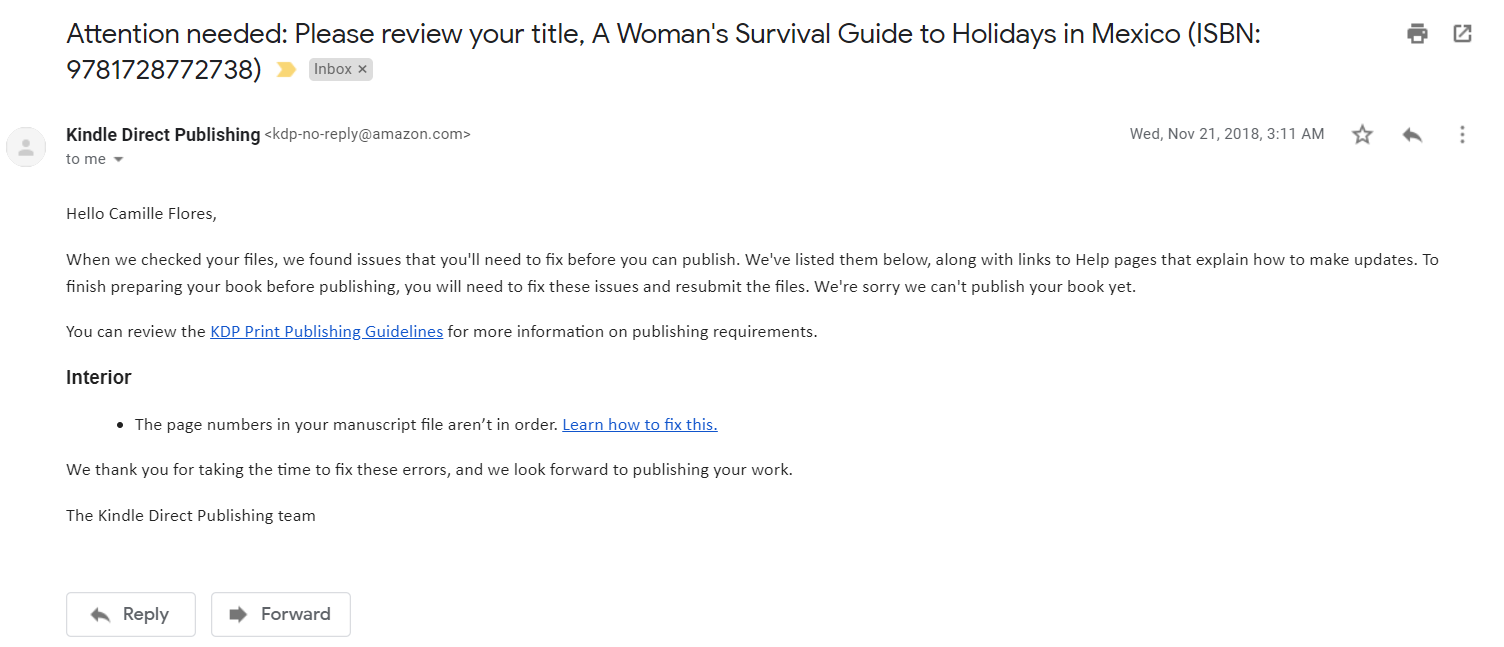
You’ll receive a notification that your book is undergoing review and another email if there is something that needs to be fixed or that the book is available for purchase. You did it!
Your cover has one job, to get people to read your book. Yep, that’s it. In order to do that, there are some components you should consider when designing your cover. (Yes, you can design your own.)
Does the cover portray the genre of your book? If you are writing a homesteading book, maybe a bodice ripper scene on the front, although certainly intriguing, wouldn’t accurately represent the information you have inside.
Who is your book written for? Your cover design should appeal to that group of people. A teen vampire love story will have a very different cover than an erotic romance between a vampire and mortal. Maybe a bodice ripper scene would work here?
Is the tone of your book represented? If your book humorously retells your backpacking disasters in Europe, a scene at the top of the Eiffel Tower, although picturesque, doesn’t scream funny, unless of course you’re dangling off the side.
What is your book about? You have to get the theme across to your potential reader in one way or another. If you book is about how to train your pet gerbil to bring in the newspaper, maybe there should be a gerbil someplace on the cover. Just saying.
There’s a lot of competition out there these days. Your cover should be memorable and unique to your book. If you have a series, or books that are related enough in topic, you might consider designing similar covers to tie them together.
Take some time to look at the covers of other books in your niche. How do you feel when you see them? How would you improve them? How can you use them as inspiration for your own cover?
If you want to include images or artwork, make sure you have permission to use them on your cover. I have an artist friend draw stuff for me. I pay her for her work and gain full rights to use them for my covers. I also make sure to include a big thank you and how to contact the artist in the back matter section, in case anyone else wants to avail themselves of her talents.
Unless you are tech savvy with experience creating covers, I suggest using the cover generator available from your publishing company. Since I publish on Amazon, Kindle Direct Publishing lets me design a cover with whatever images I want to use after I upload my book to the platform. Granted, the template options are limited. One day I may splurge and have all my books’ covers redesigned by a professional, but for now it works.
An ebook only has a front cover. The title, subtitle, author and some eye catching design are all you need. A print book has a front cover, spine and back cover. The front cover is very similar with perhaps some additional restrictions on text size and image dimensions. The spine has the title and author running sideways so you can see them when a book is placed on the shelf. The back cover might have a space for a blurb about the author or the story and a space for an image or two. The bar code is also someplace on the back.
Getting everything just so is far beyond my abilities, so I use the template. Using the template means that everything fits into the appropriate slot, and all the dimensions are hunky dory which is especially important when creating a paperback cover.
If you want to play around with color and images, Canva has a book cover template you can work with. Keep it mind that the dimensions may not be the same as those that your finished book require though.
Assignment:
Design a potential cover for your book. Does it have all of the above components? If you were a reader, would you pick a book with that cover up to read? Why or why not?
ISBN stands for International Standard Book Number and is used by publishers, booksellers, libraries, and internet retailers to identify your book. It’s either a 10 or 13 digit number found on the copyright page and on the back cover near the bar code for print books.
Each version of the book has a different ISBN assigned. Your ebook will have a different ISBN than your print book. Black and white versions will have a separate ISBN from color versions.
You need an ISBN to sell your book online, in a brick and mortar store or donate to a library. Many on-demand or self-publishing platforms will provide you with a free ISBN, including Kindle Direct Publishing, Create Space, Draft2Digital, Smashwords, IngramSpark and Lulu.
Sometimes the ISBN is not transferable between sites. For example, if you get an assigned ISBN through Draft2Digital but want to sell your book on Amazon, you may need to have another ISBN assigned by Amazon. Then you have two ISBNs for the same book.
You can buy your own ISBN from Bowker or Neilson. If you live in the United States, you’ll need to get an ISBN from Bowker Identifier Services. If you live outside the United States, check International ISBN Agency for the local agency responsible for assigning ISBN numbers.
ISSN is the International Standard Serial Number. It’s an 8-digit code used for newspapers, annual publications, journals, magazine, databases, websites and blogs. If your book is part of a series, you may have an ISSN.
You’ll find the ISSN on the upper right corner of the printed cover or wherever the editorial information is listed, probably on the copyright page. If the ISSN is for something that is considered electronic media, you’ll find it on the homepage or on the main menu.
The ISSN classification is divided into electronic (e-ISSN), print media (p-ISSN) or series (ISSN-L). Many direct publishing sites will take care of obtaining an ISSN for you if needed. If you wish to request your own, visit the ISSN International Centre here.
You may have both an ISBN and ISSN for your finished Blog to Book Project.
ASIN is an Amazon Standard Identification Number for ebooks published through Kindle Direct Publishing. It is 10 characters made up of letters and numbers.
The ASIN is not the same as an ISBN. If you are publishing a book and have an ISBN (either one you purchased or one assigned to you by Amazon) the ASIN may be the same as the ISBN, which makes it confusing. However, the ASIN is used by Amazon internally to track products and the ISBN is used to identify your book across international borders.
So let’s look at some examples. One of my Blog to Book Projects was published only at Amazon. Amazon assigned me an ASIN for my ebook (ASIN: B07BD474SQ).
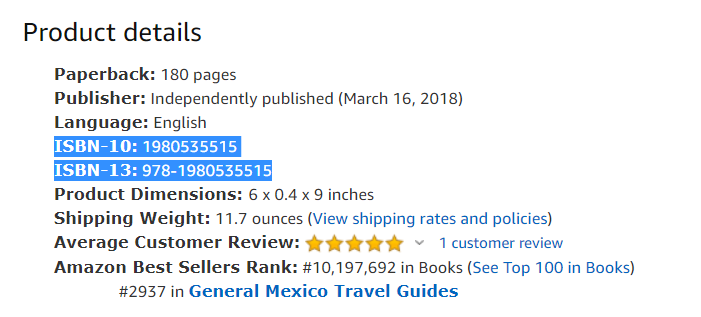
When I released the print version of the book, Amazon assigned what looks like two ISBN numbers, one with 10 digits (ISBN-10: 1980535515) and one with 13 digits (ISBN-13: 978-1980535515). In fact, the 13 digit number is the ISBN. All ISBNs since 2007 have 13 numbers. The 10 digit ISBN is actually the ASIN. Since my product is a book, the two are the same minus the first three digits.
Should you buy your own ISBN number or use a free one? That’s entirely up to you. As my budget is pretty tight, I opted to go with the free ISBN and it hasn’t been an issue for me because I only publish on Amazon. Maybe one day, when I make it big as a best selling author and have publishing houses lined up at the door to sign me up, well then maybe I’ll reconsider.
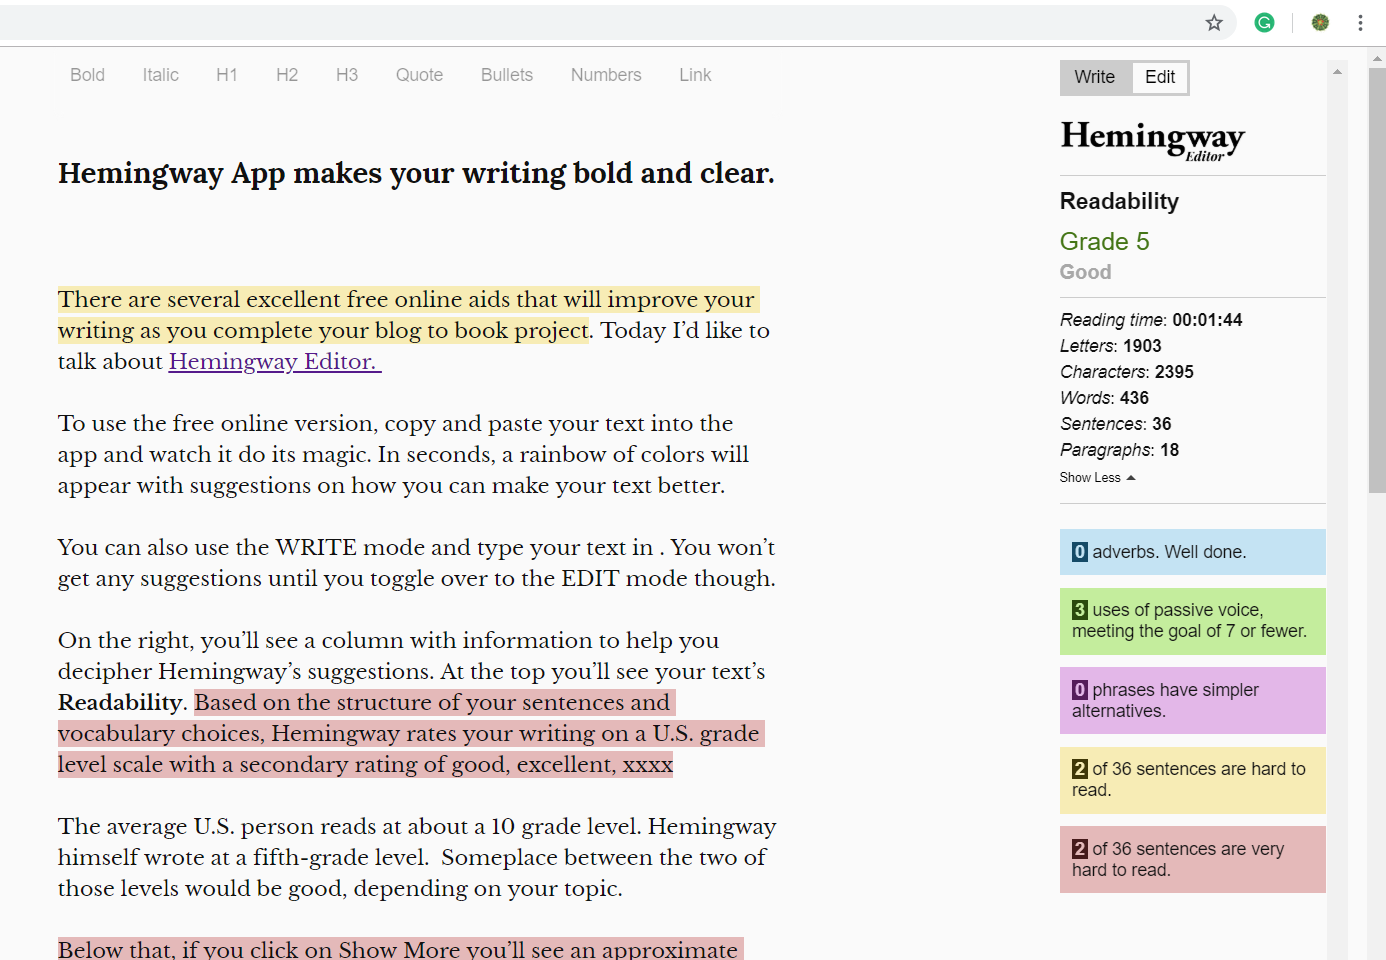
There are several excellent free online aids that will substantially improve your writing as you complete your blog to book project. Today I’d like to talk about Hemingway Editor.
To use the free online version, copy and paste your text directly into the app and watch it do its magic. In seconds, a rainbow of colors will appear with suggestions on how you can make your text better.
You can also use the WRITE mode and type your text in manually. You won’t get any suggestions until you toggle over to the EDIT mode though.
On the right, you’ll see a column with information to help you decipher Hemingway’s suggestions. At the top, you’ll see your text’s Readability. Based on the structure of your sentences and vocabulary choices, Hemingway rates your writing on a U.S. grade level scale.
The average U.S. person reads at about a 10 grade level. Hemingway himself wrote at a fifth-grade level. Someplace between the two of those levels would be good, depending on your topic.
Below that, if you click on Show More you’ll see an approximate reading time and how many letters, characters, words, sentences, and paragraphs your text contains.
Now for the color coding.
Blue is for adverbs.
Green is for passive voice.
Purple is for simpler alternatives to what you have written.
Yellow is for hard to read sentences.
Red is for very hard to read sentences.
What you choose to do with this information is up to you. If you hover over the highlighted text, you’ll see some suggestions on how to improve your writing and word choice. Maybe the yellow and red sentences can be divided into smaller sentences. Passive voice sentences can be converted to active voice. Consult a thesaurus for alternate choices for the blue and purple highlighted words.
At the top of the app, you’ll see some features to add style to your prose. Bold, Italics, headings in H1, H2, and H3 sizes, Quote, Bullets, Numbers, and Link. Use what you like and leave the rest.
Here’s how this post was rated by the Hemingway App.
Then when you are satisfied that your writing is the best it can be, copy and paste it into your book. The Hemingway App does not correct spelling or grammar mistakes. This is soley for stylistic betterment. We’ll talk about spelling and grammar in another post.
The online version of the app is completely free. There is a paid version but is quite reasonable at $19.99. The advantage of the paid version is that you can download to your desktop and use it without the internet. You can even publish directly from Hemingway to WordPress or Medium.
Assignment:
Play around with the Hemingway App today. Find out how your writing rates.
Today we are going to talk about a glossary. Not every book will have one. However, if you use regional expressions, terms in other languages, or vocabulary that your readers might not be familiar with, then you might include a glossary as one of the back matter sections of your book.
For example, I use many Mexican Spanish terms in my books. Although I define or translate the words and phrases in the text, usually using parenthesis, I could very well create a glossary and have those terms listed alphabetically for reference in the glossary.
If you include medical or legal terms, you might want to consider adding a glossary as well. It might not be convenient to stop and define these terms as they appear in the story. Hence, a glossary.
Ebook and print book glossaries are designed differently. In both types of books, there is a separate glossary section that readers can scroll through. In an ebook, the words that appear in the glossary are underlined in the text and hyperlinked to the definitions in the glossary. A print book obviously doesn’t have this linking capability.
I use Pressbooks to format most of my books rather than Microsoft Word, which I find overly complicated. Pressbooks has a glossary function and step-by-step instructions on how to create an interactive glossary.
If you are using Word to format your blog to book project, you might find this video or article helpful.
Google Docs also has instructions on how to create a glossary using their program which you can find here.
Ultimately, whether you include a glossary or not is up to you as the author. If your readers need help understanding some of the vocabulary used in your book, then a glossary is one way to help them out.
Assignment:
Decide whether or not your Blog to Book Project needs a glossary, then make it so.
There are several parts that comprise the section known as the Front Matter of your book. Not all books have every part however. The front matter uses Roman numerals to number the pages rather than cardinal numbers setting this section apart from the main text.
An optional half title page only has the title of the book. It’s the first page you see when opening the book.
A frontispiece is an illustration that is printed on the side facing the title page. It’s not required.
The title page has the title of the book and the author’s name as they appear on the cover and the spine (if it is a print book).
Your copyright page is also known as a colophon. It is on the reverse side of the title page. Here you’ll find copyrights information, ISBN, publisher, and disclaimer. (See Copyright).
A dedication page is another optional section. On this page, the author customarily names a person or people to whom the book is dedicated.
The epigraph is a page where a poem, quotation, excerpt or phrase is included as a sort of introduction to the book or theme of the book. This is also not required.
The all-essential table of contents lists the section and chapter headings and any back matter sections. In a print book, each heading is followed by the page number where that section begins. In an ebook, the heading itself is a hyperlink to that section.
You might have a list of figures/illustrations or list of tables section after the table of contents. The list of figures page has an inventory of illustrations or figures included in the book, their titles and their page numbers. The list of tables does the same for any tables included in the book.
Similarly, you may include a list of abbreviations or characters. If you use a substantial number of abbreviations throughout your book, then you might want to include a page that lists them. A list of characters page, although typically found in fiction works, also could be appended in a non-fiction book. The list would name the characters and provide a little background information about them, possibly including relationships among the characters.
Books where the order of events is of paramount importance, could include a chronology or timeline. Memoirs might have a genealogy or family tree page instead.
The foreword is a written by someone other than the author. It may provide an introduction to the book or to the author him/herself. The foreword is always signed, usually with its author’s name, place, and date. It’s optional.
A preface is another introduction, this time written by the author. It might talk about the inspiration behind the book or background material that the reader needs to know to understand the book. It’s not a requirement.
In the acknowledgements section the author publicly thanks anyone who contributed to the creation of the book including editors, Beta readers, supportive family and friends, fans, cover designers, and sometimes God himself. It’s a very personal but optional section.
Along the same lines, a list of contributors page is a recital of those who have contributed to the book, sometimes with public gratitude from the author. If a contributors page is not in the front matter, it should be positioned right before the index in the back matter. Names should be listed alphabetically by last name, but be listed first name last name. After each contributor, there may be short biographical notes, academic honors or other publications by the contributor.
In the introduction, the author talks about the goals of the book or discusses the organization and scope of the work. It’s not required. Prologues are found in fiction books. Here the story scene is set through the eyes of a character in the book, not the author.
If the front matter section is extensive, there might be a second half title page, identical to the first. It appears before the beginning of the text. The page following the second half title page may be blank or may have an epigraph.
Who knew that the Front Matter section was so substantial? Take heart, we’ll talk about each of these segments in time.
Assignment:
Decide which Front Matter sections you will include in your Blog to Book Project.
Remember, this an alphabetical listing this month, so expect some topics to be out of order when it comes to assembling your book.
Ebooks vs. Print Books
Kindle Direct Publishing (KDP) makes it easy for you to create both an ebook and a print book. (I’ll talk more about KDP in a few days). As streamlined as KDP has made the process, there are still some formatting issues that you should be aware of.
Ebooks are digital text that can be read on a Kindle or other ereader device app. Since the ebook can be read on multiple devices (Kindle, iphone, tablet, ect) the formatting is not fixed in order to accommodate text size differences. For this reason, ebooks do not have page numbers.
What this means for you, is that it is easier for you to create chapters from your blog posts without do a lot of formatting changes. You can leave images interspersed throughout the text of the chapter because the ebook formatting allows for that.
The same can not be said of print books. Both soft and hard cover books have strict formatting guidelines. This impacts the size and placement of your images. To make sure your image isn’t behemoth or teeny weeny when it appears on the page, I recommend you use Canva to create standard size images or even a collage of images.
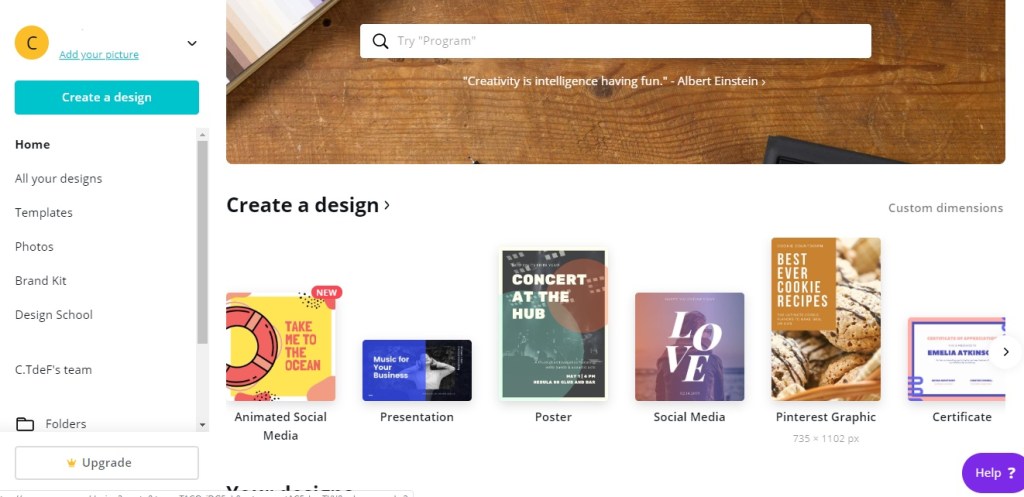
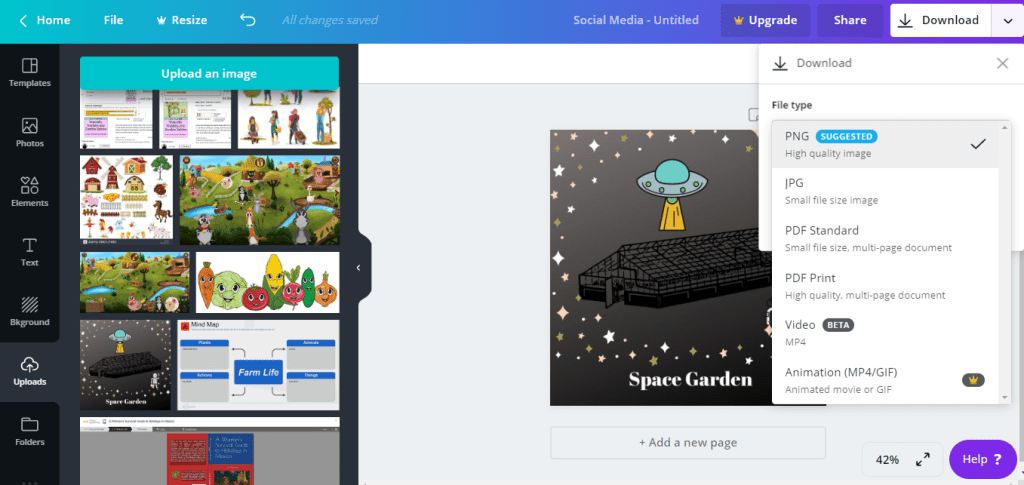
To do this, go to Canva and sign up for an account. It’s free. I use the social media 800 x 800 px template, but you could choose another size. There are even full page options. Once you choose the size you wish to work with, click on it and a new tab will open.
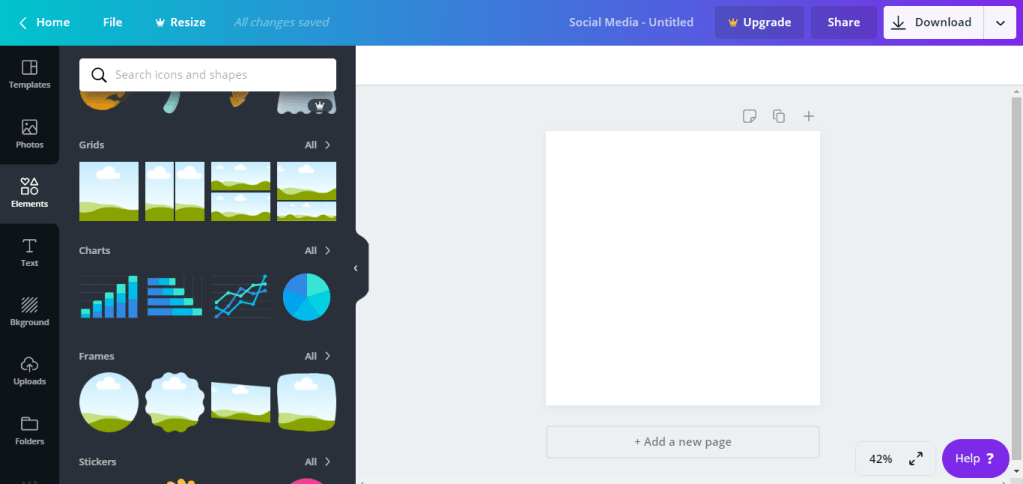
On the left, you’ll see a column with a variety of options. Choose Uploads. Click on the Upload an Image blue bar at the top. Choose the image to upload from your computer.
Now go to Elements in the left hand column. Then select Grids.
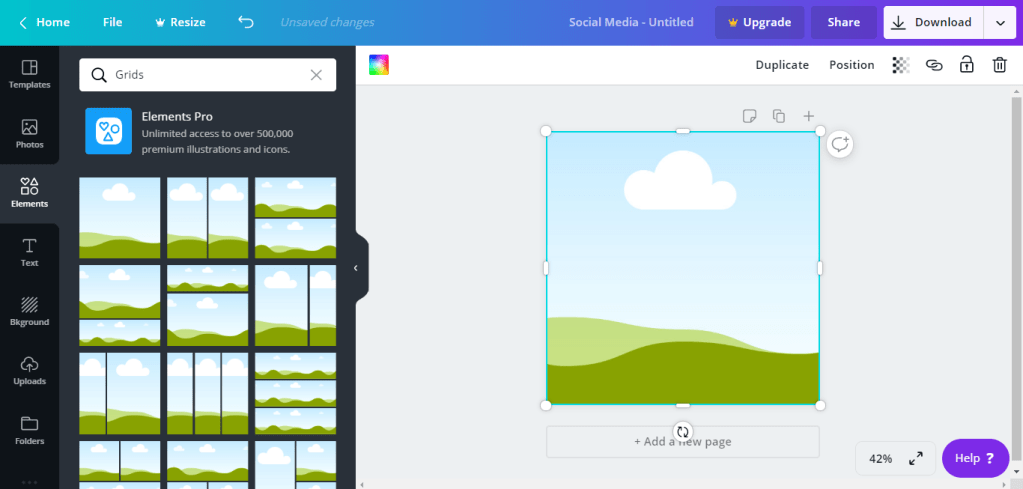
If you have just one image, you’ll want to use the first landscape image. If you have more than one image, click on a layout that meets your needs.
Return to Uploads. Click and drag your image to the layout. It will fit itself automatically.
Download your image to your computer. I recommend either PNG or JPG format. Now replace the image you have in your blog post with this new formatted image. Voila!
Another suggestion that will save you loads of time when formatting your print book is to reduce the number of images included in each chapter. Do you really need every single picture of Aunt Fran making the cake or can you get by with just the final pastry masterpiece? Then start the chapter with that image before the text or end the chapter with the image after the text. While you can certainly insert the image someplace other than the beginning or end, doing so may create more white space than you want in a print book.
Canva also has a template for making your ebook cover, which is really nice! Print book covers have more requirements and are a bit more complex, so we’ll talk about covers another day. For know, I’ll just mention that ebook covers have far less information on them than a print book cover.
There are some other differences between ebooks and print books. You can leave your hyperlinks just like they are in your blog post when you create an ebook. Print books, obviously, don’t have hyperlink capability. Therefore, if you want keep those hyperlinks, you’ll have to write them out and it tends to look messy. I recommend hyperlinks get transferred to the Appendix (remember that part?) We’ll talk about hyperlinks in an upcoming post as well.
Print books have an index to help readers find certain information. Ebooks have a search function instead. Both types of books have a table of contents, however only the ebook is interactive. There are no headers in an ebook. Footers in an ebook are converted to endnotes and appear at the end of the chapter. Ebooks can not include charts, tables or columns unless they have been converted to an image (see above) first. Ebooks also do not include tabs, paragraph returns, symbols, colored font, or text boxes (unless they are converted into an image).
So, there you have the major differences between ebooks and print books, in a nutshell.
Assignment:
Use Canva to format your images for your Blog to Book Project.
A disclaimer is a statement that limits your liability for the information contained in your Blog to Book Project. For instance, if you write about investing in the stock market and someone follows your advice and loses every red cent he has, your disclaimer will keep him from filing a lawsuit against you.
You may have some sort of disclaimer already on your blog. Affiliate and External Link Disclaimers are the most common type of blog disclaimers.
There are several types of disclaimers you can use for your book or blog.
Accurate Information Disclaimer
Although the author has made every effort to ensure that the information in this book was correct at press time, the author does not assume and hereby disclaim any liability to any party for any loss, damage, or disruption caused by errors or omissions, whether such errors or omissions result from negligence, accident, or any other cause.
Affiliate Disclaimer
Some links included in this book may be affiliate links. When you purchase a product via that link, I will receive a small commission for your patronage.
External Links Disclaimer
This book contains links to external websites with no guarantee of the accuracy, relevance, timeliness, completeness of those websites. The author assumes no responsibility for broken links, errors or omissions of external websites.
Fiction Disclaimer
This is a work of fiction. Names, characters, places, and incidents either are the product of the author’s imagination or are used fictitiously. Any resemblance to actual persons living or dead is entirely coincidental.
Fitness Disclaimer
This book contains health, fitness and nutritional information designed for educational purposes only. This information in no way replaces professional medical advice, diagnosis or treatment.
Legal Disclaimer
The information in this book is not intended or implied to be a substitute for professional legal advice, diagnosis or treatment. All content, including text, graphics, and images is for general information purposes only.
Medical Disclaimer
The information in this book is not intended or implied to be a substitute for professional medical advice, diagnosis or treatment. All content, including text, graphics, and images is for general information purposes only.
Memoir Disclaimer
This book is memoir. It reflects the author’s present recollections of experiences over time. The events and conversations in this book have been set down to the best of the author’s ability. Some names and characteristics have been changed to protect the privacy of certain individuals.
Nonfiction Disclaimer
The advice in this book may not be suitable for every situation. This work is sold with the understanding that the author will not be held responsible for the results accrued from the advice in this book.