

Creating a print book cover is a bit more complicated than an eBook cover. The bar code, spine text, and resolution needs to be just so. Kindle Direct Publishing has a handy little app to help you out here.
Launch the Cover Creator when prompted after you have uploaded your manuscript on the Content Page. The components are slightly different for print and ebooks, so in this section, I’ll just be talking about the steps for creating a cover for a print book.

If you have a pdf cover already to upload, you’ll need to make sure you have a space for the bar code. If you want the spine of your book to have the title and author name, your book must be more than 100 pages.
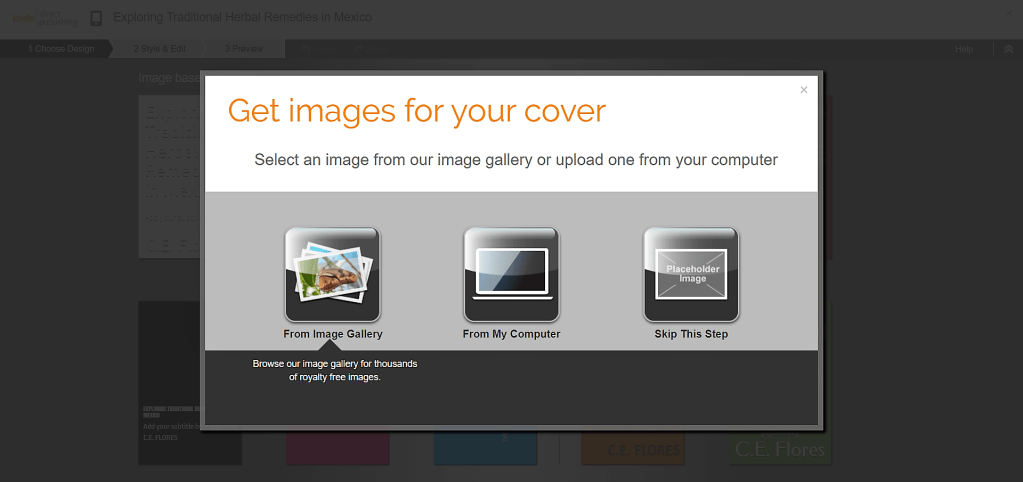
Next you’ll be prompted to choose an image from the gallery, upload a JPG, PNG or GIF image from your computer, or skip this step if you don’t have an image you want to use. Make sure the image you choose is public domain or you have permission to use it so as not to violate copyright laws.

After you’ve uploaded or choosen an image, Cover Creator generates a variety of potential cover designs. Since the program uses the book details including author, title, subtitle and ISBN, the image that you upload should not have any of these items on it. If you don’t have an image you want to use, you can choose from several other options with solid colors or background designs.

If you accidently chose the wrong image or if you get a poor resolution notification, you’ll have a chance to change the image. Your image should be 300 pixels per inch (DPI) at the size you want it to appear on your cover. Sometimes it’s just a matter of resizing the picture until it reaches the acceptable DPI.
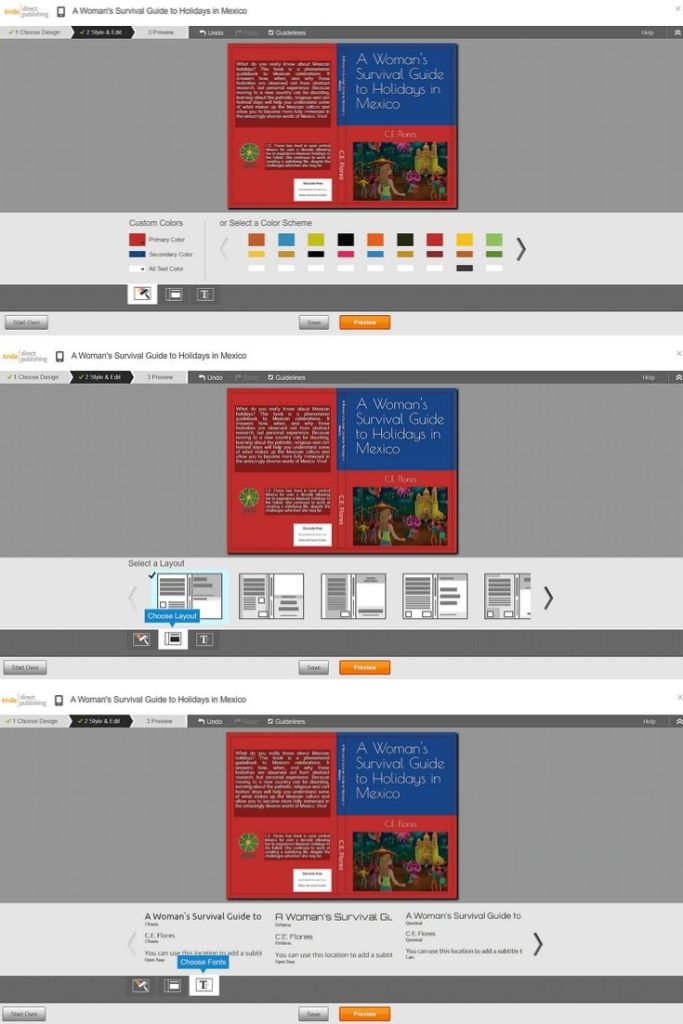
Choose the color scheme you would like to use. You can choose from already paired colors or pick your own. Then, select a layout for the print part of the cover. Finally choose a font and select the orange “Preview” button.
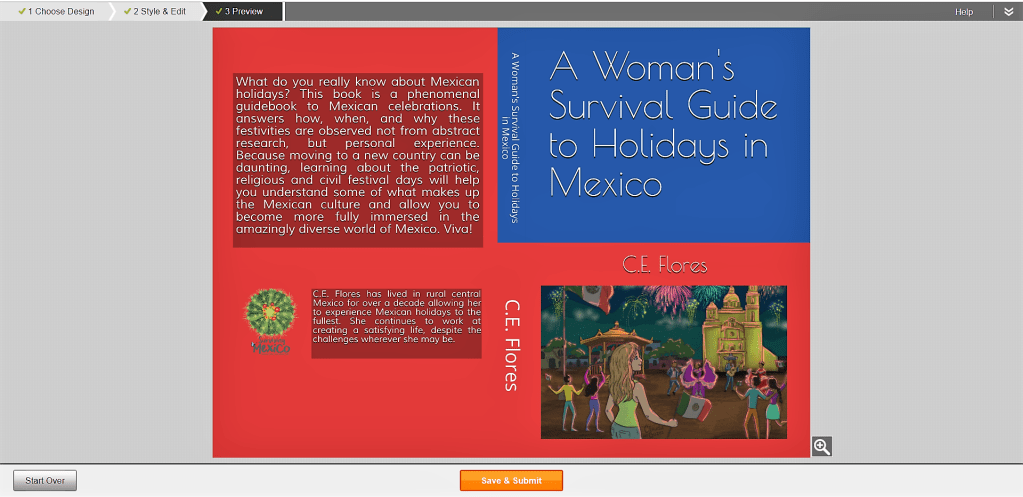
Make sure to preview your cover to ensure the text is readable and the image looks good. The information on the back cover could be About the Author or a blurb about the content of the book or both. It’s up to you. You can even leave it blank. Just don’t add anyinformation and in final version the prompt section will disappear.
If you like how everything looks, you can hit “Save & Submit.” If you don’t, then you can “Start Over.” If you want to change your image, click on it and you’ll get the option to choose another image or change its size, position or rotation.
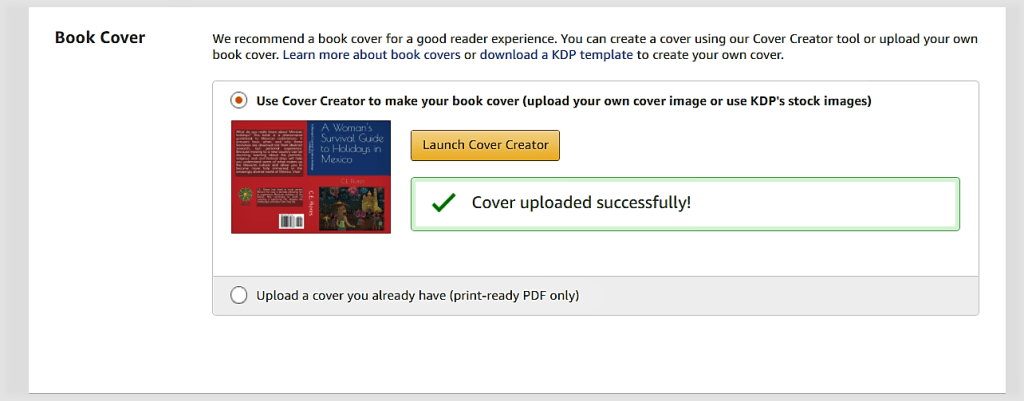
There you have it! Now you’ll see a checkmark with “Cover uploaded successfully” next to the thumbnail of your finished cover.
Assignment: Use Cover Creator or upload your print book cover.

