Blog to Book Project — Front Matter

Front Matter

There are several parts that comprise the section known as the Front Matter of your book. Not all books have every part however. The front matter uses Roman numerals to number the pages rather than cardinal numbers setting this section apart from the main text.

An optional half title page only has the title of the book. It’s the first page you see when opening the book.

A frontispiece is an illustration that is printed on the side facing the title page. It’s not required.

The title page has the title of the book and the author’s name as they appear on the cover and the spine (if it is a print book).

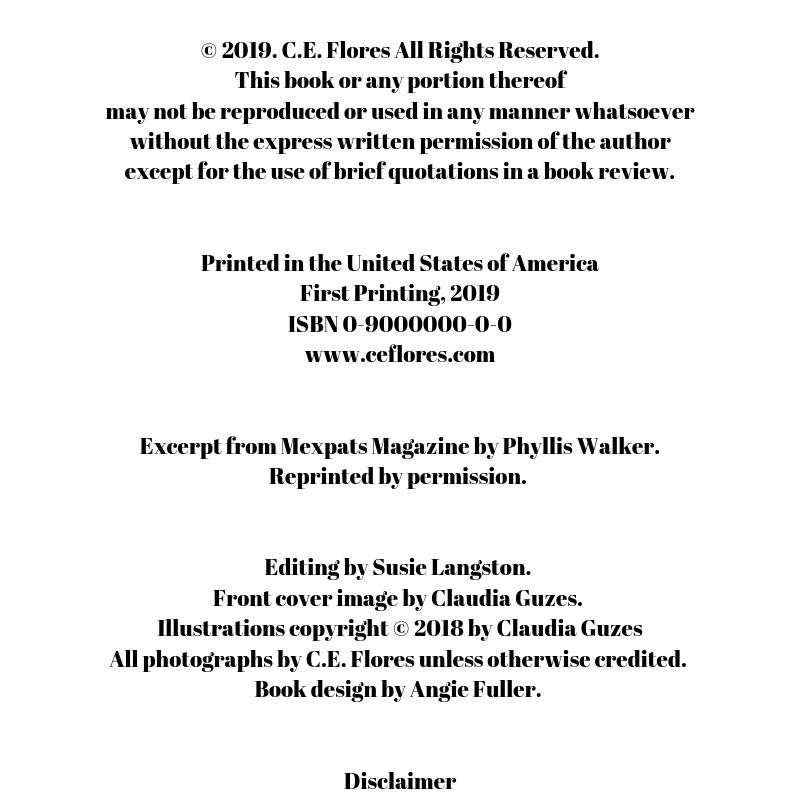
Your copyright page is also known as a colophon. It is on the reverse side of the title page. Here you’ll find copyrights information, ISBN, publisher, and disclaimer. (See Copyright).

A dedication page is another optional section. On this page, the author customarily names a person or people to whom the book is dedicated.

The epigraph is a page where a poem, quotation, excerpt or phrase is included as a sort of introduction to the book or theme of the book. This is also not required.  

The all-essential table of contents lists the section and chapter headings and any back matter sections. In a print book, each heading is followed by the page number where that section begins. In an ebook, the heading itself is a hyperlink to that section.

You might have a list of figures/illustrations or list of tables section after the table of contents. The list of figures page has an inventory of illustrations or figures included in the book, their titles and their page numbers. The list of tables does the same for any tables included in the book.

Similarly, you may include a list of abbreviations or characters. If you use a substantial number of abbreviations throughout your book, then you might want to include a page that lists them. A list of characters page, although typically found in fiction works, also could be appended in a non-fiction book. The list would name the characters and provide a little background information about them, possibly including relationships among the characters.

Books where the order of events is of paramount importance, could include a chronology or timeline. Memoirs might have a genealogy or family tree page instead.

The foreword is a written by someone other than the author. It may provide an introduction to the book or to the author him/herself. The foreword is always signed, usually with its author’s name, place, and date. It’s optional.

A preface is another introduction, this time written by the author. It might talk about the inspiration behind the book or background material that the reader needs to know to understand the book. It’s not a requirement.

In the acknowledgements section the author publicly thanks anyone who contributed to the creation of the book including editors, Beta readers, supportive family and friends, fans, cover designers, and sometimes God himself. It’s a very personal but optional section.

Along the same lines, a list of contributors page is a recital of those who have contributed to the book, sometimes with public gratitude from the author. If a contributors page is not in the front matter, it should be positioned right before the index in the back matter. Names should be listed alphabetically by last name, but be listed first name last name.  After each contributor, there may be short biographical notes, academic honors or other publications by the contributor.

In the introduction, the author talks about the goals of the book or discusses the organization and scope of the work. It’s not required. Prologues are found in fiction books. Here the story scene is set through the eyes of a character in the book, not the author.

If the front matter section is extensive, there might be a second half title page, identical to the first. It appears before the beginning of the text. The page following the second half title page may be blank or may have an epigraph.

Who knew that the Front Matter section was so substantial? Take heart, we’ll talk about each of these segments in time.

Assignment:

Decide which Front Matter sections you will include in your Blog to Book Project.  

Blog to Book Project — Ebooks vs. Print Books

Remember, this an alphabetical listing this month, so expect some topics to be out of order when it comes to assembling your book.

Ebooks vs. Print Books

Kindle Direct Publishing (KDP) makes it easy for you to create both an ebook and a print book. (I’ll talk more about KDP in a few days). As streamlined as KDP has made the process, there are still some formatting issues that you should be aware of.

Ebooks are digital text that can be read on a Kindle or other ereader device app. Since the ebook can be read on multiple devices (Kindle, iphone, tablet, ect) the formatting is not fixed in order to accommodate text size differences. For this reason, ebooks do not have page numbers.

What this means for you, is that it is easier for you to create chapters from your blog posts without do a lot of formatting changes. You can leave images interspersed throughout the text of the chapter because the ebook formatting allows for that.

The same can not be said of print books. Both soft and hard cover books have strict formatting guidelines. This impacts the size and placement of your images. To make sure your image isn’t behemoth or teeny weeny when it appears on the page, I recommend you use Canva to create standard size images or even a collage of images.

To do this, go to Canva and sign up for an account. It’s free. I use the social media 800 x 800 px template, but you could choose another size. There are even full page options. Once you choose the size you wish to work with, click on it and a new tab will open.

On the left, you’ll see a column with a variety of options. Choose Uploads. Click on  the Upload an Image blue bar at the top. Choose the image to upload from your computer.

Now go to Elements in the left hand column. Then select Grids.

If you have just one image, you’ll want to use the first landscape image. If you have more than one image, click on a layout that meets your needs.

Return to Uploads. Click and drag your image to the layout. It will fit itself automatically.

Download your image to your computer. I recommend either PNG or JPG format. Now replace the image you have in your blog post with this new formatted image. Voila!

Another suggestion that will save you loads of time when formatting your print book is to reduce the number of images included in each chapter. Do you really need every single picture of Aunt Fran making the cake or can you get by with just the final pastry masterpiece? Then start the chapter with that image before the text or end the chapter with the image after the text. While you can certainly insert the image someplace other than the beginning or end, doing so may create more white space than you want in a print book.

Canva also has a template for making your ebook cover, which is really nice! Print book covers have more requirements and are a bit more complex, so we’ll talk about covers another day. For know, I’ll just mention that ebook covers have far less information on them than a print book cover.

There are some other differences between ebooks and print books. You can leave your hyperlinks just like they are in your blog post when you create an ebook. Print books, obviously, don’t have hyperlink capability. Therefore, if you want keep those hyperlinks, you’ll have to write them out and it tends to look messy. I recommend hyperlinks get transferred to the Appendix (remember that part?) We’ll talk about hyperlinks in an upcoming post as well.

Print books have an index to help readers find certain information. Ebooks have a search function instead. Both types of books have a table of contents, however only the ebook is interactive. There are no headers in an ebook. Footers in an ebook are converted to endnotes and appear at the end of the chapter. Ebooks can not include charts, tables or columns unless they have been converted to an image (see above) first. Ebooks also do not include tabs, paragraph returns, symbols, colored font, or text boxes (unless they are converted into an image).

So, there you have the major differences between ebooks and print books, in a nutshell.

Assignment:

Use Canva to format your images for your Blog to Book Project.

Blog to Book Project — Disclaimer

Disclaimer

A disclaimer is a statement that limits your liability for the information contained in your Blog to Book Project. For instance, if you write about investing in the stock market and someone follows your advice and loses every red cent he has, your disclaimer will keep him from filing a lawsuit against you.

You may have some sort of disclaimer already on your blog. Affiliate and External Link Disclaimers are the most common type of blog disclaimers.

There are several types of disclaimers you can use for your book or blog.

Accurate Information Disclaimer

Although the author has made every effort to ensure that the information in this book was correct at press time, the author does not assume and hereby disclaim any liability to any party for any loss, damage, or disruption caused by errors or omissions, whether such errors or omissions result from negligence, accident, or any other cause.

Affiliate Disclaimer

Some links included in this book may be affiliate links. When you purchase a product via that link, I will receive a small commission for your patronage.

External Links Disclaimer

This book contains links to external websites with no guarantee of the accuracy, relevance, timeliness, completeness of those websites. The author assumes no responsibility for broken links, errors or omissions of external websites.

Fiction Disclaimer

This is a work of fiction. Names, characters, places, and incidents either are the product of the author’s imagination or are used fictitiously.  Any resemblance to actual persons living or dead is entirely coincidental.

Fitness Disclaimer

This book contains health, fitness and nutritional information designed for educational purposes only. This information in no way replaces professional medical advice, diagnosis or treatment.

Legal Disclaimer

The information in this book is not intended or implied to be a substitute for professional legal advice, diagnosis or treatment. All content, including text, graphics, and images is for general information purposes only.

Medical Disclaimer

The information in this book is not intended or implied to be a substitute for professional medical advice, diagnosis or treatment. All content, including text, graphics, and images is for general information purposes only.

Memoir Disclaimer

This book is memoir. It reflects the author’s present recollections of experiences over time. The events and conversations in this book have been set down to the best of the author’s ability. Some names and characteristics have been changed to protect the privacy of certain individuals.

Nonfiction Disclaimer

The advice in this book may not be suitable for every situation. This work is sold with the understanding that the author will not be held responsible for the results accrued from the advice in this book.

Assignment:

Write your disclaimer.

Blog to Book Project — Copyright

Copyright page

Copyright is “the exclusive legal right to reproduce, publish, sell, or distribute the matter and form of something” according to Merriam Webster. You may reference facts, sources or other generally known bits of information in your Blog to Book Project as long as you give credit where credit is due. This information would be included in your Appendix (remember we talked about that?)

Once your book is published, you own the copyright to everything in the book. That means you can:

  • Reproduce the work in a book or other form, like an ecourse.
  • Benefit financially from proceeds of the work.
  • Create works that build upon your work (translations, sequels, adaptations, etc).
  • Display or perform your work (plays, Youtube videos, podcasts).

You own those rights. If anyone else uses your content for his or her own purposes, then you have the right to file a copyright infringement claim.

So say that your book, Everything You Need to Know to Turn Your Blog Posts into a Book, appears on Udemy as a course. The course uses your book’s instructions and even direct quotes. Only you didn’t make that course and someone else is receiving money by presenting your hard work in a different format. COPYRIGHT INFRINGEMENT! In this case, you’ll contact the course creator and Udemy, since they are hosting the course, and insist that it be removed.

Your copyright page comes right after the title page and just before the table of contents. The copyright expires between 50 and 70 years after an author’s death, depending on the country, and the work then becomes public domain, so it can be distributed by anyone.

Your copyright page should include:

  • © symbol or “copyright.”
  • Publication year
  • Your name
  • All Rights Reserved.
  • Copyright notice
  • Book editions
  • ISBN Number (We’ll discuss this in more detail on another day.)
  • Your website
  • Permissions Notice if you use copyrighted information in your book.
  • Credits to the book (cover designer, editor)
  • Disclaimer (We’ll talk about disclaimers tomorrow.)

Assignment:

Create the rough draft of your copyright page.

Blog to Book Project — Blog Posts vs. Book Chapters

What is the difference between a blog post and a book chapter?

There are some basic differences between the two. However, what you’ll find is that with a little tweaking, you’ll be able to create chapters for your book from your blog posts.

Sections of a Blog Post

  • Headline
  • Hook ‘em stellar introduction
  • Tell your story
  • Add some bullet points
  • Link to credible sites that support the details
  • Add eye-catching images
  • End with a call-to-action (respond in the comments, share, buy)

Chapter of a Book

  • Title
  • Interest grabbing introduction
  • Tell your story
  • Conclusion
  • Pictures

As an example, let’s compare the structure of a blog post that I turned into a chapter in a book.

The blog post had the title: Women in Mexican History–Josefa Ortiz de Dominguez. When it became a chapter of A Woman’s Survival Guide to Holidays in Mexico, the title of this chapter became: Josefa Ortiz de Dominguez.

There were two images in the blog post to break up the text. These were rearranged in the book chapter so that one was at the beginning and one was at the end of the chapter. Doing so helped with the page formatting so that there wasn’t a dangling sentence on one page all by itself.

There were a number of hyperlinks to back up the historical information as it pertained to Josefa ’s story. Those hyperlinks were moved to a section entitled Josefa Ortiz de Dominguez in the Appendix for the book. (We talked about the Appendix yesterday remember?)

The blog post ended with the call to action for readers to buy the book A Woman’s Survival Guide to Holidays in Mexico. The book does not have a call to action at the end and the chapter concludes at that point.

In this example, there weren’t any drastic writing changes in the conversion from post to chapter. Sometimes more information will need to be added to the chapter if there are gaps in information. This might happen if you have written about a topic on your blog and link to a prior post rather than go through the whole story again. Sometimes information should be removed from the chapter if it isn’t relevent to the book topic.

This post didn’t have any bullet points either. For the most part, my chapters don’t have bullet points since they tend to mess with the formatting in a book . If they aren’t just so, you can have more white space than you want. However, there’s nothing wrong with bullet points appropriately positioned in a book chapter.

Theme

Although it seems relatively straight forward converting your blog posts into chapters, you need to keep in mind that the book you are creating should not just be a collection of your blog posts.

Books have themes that tie the chapters together. Your Blog to Book Project should have a dedicated theme.

To illustrate this point, I wrote a series of blog posts about being a Prepper and living off-grid in central Mexico. I compiled those 30 odd posts into a book for Preppers considering Mexico as a bug-out location. I ONLY included posts related to our life as Preppers. I did not include any posts about me being an ESL teacher, our animals, or building our house. Those are topics I am in the process of compiling into separate books.

How to Choose a Theme

As you blog, you should have been organizing your posts by category or tag. Checking which categories have the most reader interaction would be a good way to pick a topic for your blog to book project.

It often helps to think of your future blog to book project as a proposed solution to a specific question. In the book A to Z Reasons Why La Yacata is the Place to Be in Any Disaster: A Prepper’s Guide to Mexico, the question is whether Mexico would be a good location WTSHTF (when the shit hits the fan) or not. The book addresses natural, political and personal disaster situations from the perspective of a long-time resident of Mexico. By the end of the book readers should have an idea about the most important drawbacks or benefits to living in Mexico and if there are ways to alleviate the danger of these disaster potentials.

Organization

You should also consider the structure of your book. In the above-mentioned book, the chapters were listed alphabetically. In another book, A Woman’s Survival Guide to Holidays in Mexico, the chapters were organized chronologically from January to December. The organizational strategy that you choose should be easy to follow and make sense for your topic. Chapters are very rarely organized by the date they appeared on your blog.

Your assignment for today is to choose a topic for your Blog to Book Project and decide how to organize the posts that will be included.

Blog to Book Project — Appendix

Today, we are starting with the end of the book–the Appendix.

So what is the appendix and why do you need one in your blog to book adventure?

Yes, yes, I know it’s a part of the human body that spontaneously combusts and causes life-threatening infection or even death. But in the writing world, an “Appendix is defined as the section at the end of a book that gives additional information on the topic explored in the contents of the text.

Do you need an appendix? Not necessarily. However, if you need to explain something in addition to the text of the book, this is where you would put it. This is also where you would list other books related to the subject your blog to book project is about, references and citations.

Since your blog to book project is non-fiction, having an appendix that lists this information adds credibility to your story. For instance, if I’m writing about how I do not have internet access at my home in central Mexico, I might include a summary and link to a study done by the Mexican government that states that in the area I live in only 1 in 8 people have internet access. The citation says “See, people, I”m not making it up!” and my story is, therefore, more believable.

So biographies, autobiographies, memoirs, and research-based books all would do well to have an appendix backing up the statements in the book. You could also include full copies of letters you excerpt in your blog to book project since including the full letter in the text might be uneccessary. Or maybe something scientific needs further explaining, so you include a graph or diagram in the appendix. If it adds to the credibility or understandability of your story, then it should be in the appendix.

You can actually have more than one appendix section. One section might contain a bibliography of works cited. Another might cite the sources for all the quotes you used in images throughout your book. A third part might list background information about people that appear in your story. In this case, each separate appendix might be titled Appendix A, Appendix B, Appendix C.

Your assignment for today is to take a look at the information you want to include in your blog to book project and decide what will be in the appendix. Then make it so.

2019 A to Z Theme Reveal

It’s that time again! April means the A to Z Challenge is upon us. I have completed the A to Z challenge successfully at Surviving Mexico Adventures and Disasters in previous years (See ) and this year I plan on stretching my wings here at Content Creative.

So….drumroll, please! My 2019 A to Z Challenge theme is Blog to Book Project.

What is a Blog to Book Project?

I’m so glad you asked. The idea behind the Blog to Book Project is to turn your blog posts into a book. All the juicy information you’ve been blogging can and should be reworked into a shelf-worthy product.

Over the course of the next few weeks, I am going to highlight different aspects of taking your blog posts and crafting them into publishable prose. Although my focus will be on the preparation of a non-fiction book, you can certainly use the same process to generate a volume of poetry, a work of fiction, or even a graphic novel.

Since this is an A to Z Challenge, I will be focusing on one aspect for each letter for 26 posts in all. And since it will be in order, it might not be in the order you would actually complete that step. Never fear, my plan is to compile these posts (and the other stuff that didn’t make the letter cut) into a Blog to Book Project BOOK shortly.

The A to Z Challenge will pretty much take all of April, but in May, you can expect to see more book reviews, author interviews and maybe even a giveaway or two.

Featured by A to Z Challenge

AtoZ2019BookTour

Well, much to my surprise, I was featured this month by the A to Z Challenge crew! On February 10, my guest post was here. I wrote an A to Z list about how to turn your blog posts into books, which of course, I have experience doing. I like the list so much that I think I’ll expand on it for the April A to Z Challenge.

atozcover

My book A to Z Reasons Why La Yacata is the Place to Be in Any Disaster: A Prepper’s Guide to Mexico was also featured by the A to Z Team in my first ever book hop! You can find the features by:

So if you get the chance, hop on by and share some love with these wonderful bloggers!